Enabling centralized logging in Linux

September 30, 2005 2 comments
Here is a tip to make your machine save logs to a remote machine (remote_mc) instead of logging locally. For this to succeed, you have to make changes to both the remote machine which accepts the logs on behalf of your local machine as well as the local machine itself.

On the remote machine enable remote logging
Set up syslogd to accept remote messages. Edit the /etc/sysconfig/syslog file and insert the following line:

#File: /etc/sysconfig/syslog
SYSLOGD_OPTIONS="-r -m 0"


The file is liberally commented. -r means to enable remote logging and '-m 0' means to disable "MARK" messages.

Restart syslogd
# service syslog restart

Now the machine (remote machine) will accept logging messages from other machines.

On your local machine which sends the logging message
Edit the /etc/syslog.conf file to direct the logging messages to the remote machine (remote_mc).

#File: /etc/syslog.conf
...
*.emerg;user.*;kern.err @remote_mc
...

Here I have chosen to send all emergency messages, all user program generated logs and any kernel errors to be logged at the remote machine.

Lastly for the changes to take effect, restart the syslog daemon on your local machine.
# service syslog restart

Note: This tip is applicable to RedHat based systems but also can be used for debian based systems with some modifications.

Testing your setup
Generate a log message on your local machine using the logger command:

$ logger -i -t ravi "I am just testing this. This message can be ignored."

logger is a shell command which makes entries in the system log. It provides a shell interface to the syslog system log module. In the above command, -i logs the process ID of the logger process on each line. And -t option tags every line in the log with my name.

Now go and check on the remote machine (remote_mc) to see if the logs have been generated.

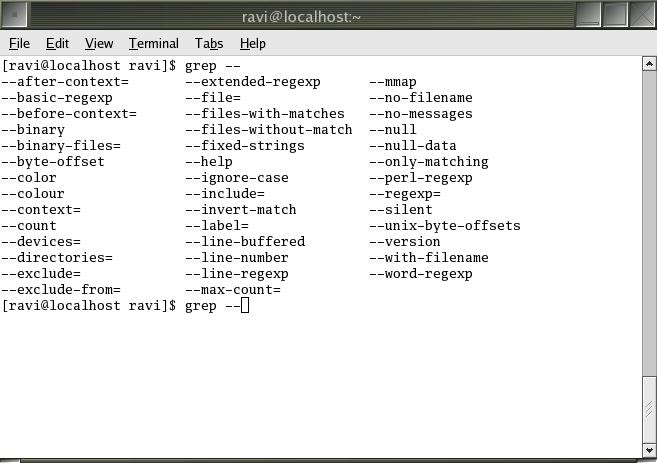
remote_mc $ cat /var/log/messages | grep ravi

Also read : System logging explained in Linux

System Logging explained in Linux

September 29, 2005 0 comments
This short guide explains the concept of system logging in Linux.

Log files form the life line of any system administrator. They help pin point any discrepancies in the day to day functioning of the OS.

Backup your data with Rsync

September 25, 2005 0 comments
This is a short guide to using rsync tool to efficiently backup your data.

What is Rsync ?


Rsync is a fast, highly versatile file copying tool.

You can use rsync to copy your data (files and directories) in following situations -

Find command - Search for files in Linux

September 21, 2005 11 comments
This article explains how to use the Linux command find to search for files.

find helps you to locate files and directories satisfying different criteria.

But the sheer number of options find has makes it simultaneously - both powerful and complex to use.

find syntax


The basic syntax for using find is as follows.

find {where-to-look} {search-criteria} {what-to-do-with-the-result}

  • {where-to-look} indicates the full path of the location to search. Use '.' to denote current directory.
  • {search-criteria} - This is a combination of various options which includes regular expressions, you can use to filter the search.
  • {what-to-do-with-the-result} - How do you want the results to be displayed ? Or do you want them to be piped to another program ?

find options


The frequently used find options are as follows.

  • -name {search-pattern} - The search is case sensitive.
  • -iname {search-pattern} - The search is case insensitive.
  • -size [+|-]n[cwbkMG] - The file(s) should be [atleast/atmost] 'n' [units] in size.
    and the units are - c {bytes}; w {two-byte words}; b {512-byte blocks}; k {Kilobytes}; M {Megabytes}; G {Gigabytes}.
  • -type [fdlcpsb] - The type of file to search for. File types can be one of the following -
    f {file}; d {directory}; l {symbolic link}; c {character}; p {named pipe - FIFO}; s {socket}; b {block device}

There are a whole lot more options for the 'find' command. To know more about the options, read the 'find' manpage.

Find examples


Find all HTML files starting with letter 'a' in your current directory (Case sensitive)

$ find . -name a\*.html

Same as above but case insensitive search.

$ find . -iname a\*.html

Find files which are larger than 5 MB in size.

$ find . -size +5000k -type f

Here the '+' in '+5000k' indicates greater than and k is kilobytes. And the dot '.' indicates the current directory. The -type option indicates it should be a file.

Find all empty files in your directory

$ find . -size 0c -type f

You can also use -empty instead of -size 0c to search for all the empty files.

Find is very powerful in that you can combine it with other commands.

Find all empty files in the current directory and delete them -

$ find . -empty -maxdepth 1 -exec rm {} \;

To search for a html file having the text 'Web sites' in it, you can combine find with grep as follows:

$ find . -type f -iname \*.html -exec grep -s "Web sites" {} \;

-s is an option of grep tool that suppresses errors about non-existent or unreadable files.

{} is a placeholder for the files found.

; is escaped using backslash so as not to be interpreted by bash shell.

You can use the -exec option to combine any command in Linux with the find command.


Some of the useful things you can do with it are as follows:

Compress log files on an individual basis

$ find /var -iname \*.log -exec bzip {} \;

Find all files which belong to user lal and change its ownership to ravi

# find / -user lal -exec chown ravi {} \;

You can also use xargs command instead of the -exec option as shown below to get the same result.

$ find /var -iname \*.log | xargs bzip -

Find all files which do not belong to any user.

$ find . -nouser

Find files which have permissions rwx for user and rw for group and others.

$ find . -perm 766

... and then list them.

$ find . -perm 766 -exec ls -l {} \;

Find all directories with name music_files

$ find . -type d -iname \*music_files\*

Find files of size between 700k and 1000k.

$ find . \( -size +700k -and -size -1000k \)

And how about getting a formatted output of the above command with the size of each file listed ?

$ find . \( -size +700k -and -size -1000k \) -exec du -Hs {} \; 2>/dev/null

2>/dev/null means all the error messages are discarded or suppressed. See Input-Output Redirection to know more.

You can also limit your search by file system type. For example, to restrict search to files residing only in the NTFS and VFAT filesystem, do the following -

$ find / -maxdepth 2 \( -fstype vfat -or -fstype ntfs \) 2> /dev/null

These are the most common uses of the find command. You can see additional uses by reading the find manual.

Routing , NAT and Gateways in Linux

September 18, 2005 0 comments
This article explains the concept of a router, NAT, and a gateway and how to configure these in Linux.

How to setup SSH keys and why?

September 16, 2005 6 comments
This guide explains the concept of SSH keys and their use.

This is a continuation of the previous guide - SSH Secure Shell that explains the basics of SSH. Please read the guide if you haven't already, before continuing further.

What is an SSH key ?


SSH keys serve as a means of identifying yourself to an SSH server using public-key cryptography and challenge-response authentication.

Prohibiting users from shutting down or rebooting the machine

September 15, 2005 0 comments
If you are allowing the general public, access to your computers (Like for example, in a cyber cafe), then you will be interested in restricting the users from shutting down or rebooting your Linux machine. The following are the steps needed to accomplish this:

Disable access through the Action Menu (Applicable to GNOME desktop)
Run the gconf-editor program on the GNOME desktop,

# gconf-editor

and check off the entry for /apps/gnome-session/options/logout_prompt.

Disable shutdown and reboot commands at the login screen
The gdm daemon is responsible for managing the login screen in X. Edit the /etc/X11/gdm/gdm.conf file, and set the 'SystemMenu' directive to 'false'.

Note: The gdm.conf file is a liberally commented file which contains a lot of configuration parameters which can be changed to modify how the system logs in for an X session. For example if you want the system to log in automatically to a users account after an interval of logout period then you set the 'TimedLoginEnable' parameter to true.

Prevent users from executing these commands in the console
Rename the reboot, poweroff, and halt files under the /etc/security/console.apps/ directory.
And finally ...

Disable the Ctrl+Alt+Del key combination
Comment out the following line in the /etc/inittab file:

# FILE: /etc/inittab
# ca::ctrlaltdel:/sbin/shutdown -t3 -r now

This will disable the Ctrl+Alt+Del key sequence . Now only root can power off or reboot the machine.

Also read:
Give selective superuser powers to users.

How to change MAC address

September 14, 2005 2 comments
Changing MAC address of a machine is called spoofing a MAC address or faking a MAC address. In linux, you can change MAC address of your machine.This is how it is done.

How to change MAC address in Linux


First find the physical MAC address of your machine by running the following command :

$ ifconfig -a | grep HWaddr
eth0  Link encap:Ethernet HWaddr 00:80:48:BA:d1:20

The hexadecimal numbers in blue denote my machine's MAC address. Yours will be different. Learn how to use the ifconfig Linux command.

You can also use ethtool to find the hardware address of your machine.


Next, login as root in Linux and enter the following commands -

# ifconfig eth0 down
# ifconfig eth0 hw ether 00:80:48:BA:d1:30
# ifconfig eth0 up
# ifconfig eth0 |grep HWaddr

I have changed the MAC address to a different number highlighted in blue. 00:80:48:BA:d1:30 is the new MAC address I have provided for my Linux machine. You can choose any 48 bits hexadecimal address as your MAC address.


Why you should change MAC address of your Linux machine


These are the reasons you should change the MAC address of your machine.
  • For privacy  - For instance when you are connecting to a Wi-Fi hotspot.
  • To ensure interoperability. Some internet service providers bind their service to a specific MAC address; if the user then changes their network card or intends to install a router, the service won't work anymore. Changing the MAC address of the new interface will solve the problem.

Caveats to Changing MAC address


In Linux, Windows, Mac OS X, or a different operating system, changing MAC address is only temporary. Once you reboot your machine, the operating system reflects the physical MAC address burnt in your network card and not the MAC address you set.

Bash Completion - Makes life easier for Linux users

September 13, 2005 4 comments
One thing that really makes working in the command line in Linux a pleasure is the various in-built shortcuts and name completion features in Bash - the default shell in Linux.

But one grouse I always had was it was really difficult to remember all the options that each command had. For example, 'find' came with numerous options which I found difficult to memorize and had to resort to reading the man page each time I had to use the command. Now you can enhance the bash shell to give you the added functionality of listing the options that can be used with a command. For that you should download and install an add-on package called bash-completion. I use Fedora Core 2 but if you are using the latest Linux distribution, it might be installed by default on your machine.
In Debian based Linux distributions, you may install it using the following command :
# apt-get install bash-completion
After installing the bash-completion package, fire up a terminal and type:

$ grep --

... followed by two TABs and you get all the options that can be passed to the grep command (see figure). This works for any command in linux. Now you don't have to remember all those options that need be passed to the programs any longer.

bash completion
Also read:
Bash Shell Shortcuts
Special Shell Variables

Apache : Name-based Vs IP Based Virtual Hosting

September 10, 2005 1 comments
Often when, you attend interviews for network administration related jobs , the one question you may encounter while discussing about web servers is the difference between name-based and IP based virtual hosting. Here I will explain the difference between the two.

In IP-based virtual hosting, you are running more than one web site on the same server machine, but each web site has its own IP address. In order to do this, you have to first tell your operating system about the multiple IP addresses. See my post on configuring multiple IP addresses on a single NIC . You also need to put each IP in your DNS, so that it will resolve to the names that you want to give those addresses .

In Name-based virtual hosting, you host multiple websites on the same IP address. But for this to succeed, you have to put more than one DNS record for your IP address in the DNS database. This is done using CNAME tag in BIND. You can have as many CNAME(s) as you like pointing to a particular machine. Of course, you also have to uncomment the NameVirtualHost section in httpd.conf file and point it to the IP address of your machine.

#FILE: httpd.conf
...
NameVirtualHost 192.168.0.1
...

This excellent article on Serverwatch.com explains in detail the configuration details of both types of virtual hosting in apache webserver.

Implementing DNS on Linux - Part III

September 07, 2005 1 comments
This is the third and final part of my post on DNS. You can read the part I and part II of this post if you haven't done yet and then come back to this post.
Check BIND Syntax with these utilities
If there is a syntax error in the files /etc/named.conf or /var/named/* files, then the BIND server will fail to start. There are two utilities that come along with BIND which helps one to check for syntax errors in the files. They are :
  • named-checkconf - This script checks the /etc/named.conf file for any syntax errors.
  • named-checkzone - This file checks for any syntax errors in a specific zone configuration.
# named-checkzone mysite.com /var/named/mysite.com.zone

BIND Utilities
Many useful utilities are included in the bind-utils RPM package. Some of these are as follows:
host - This is a utility used to gather host/domain information. It is capable of showing all the information about a host and / or listing an entire domain.

# host -a www.mysite.com


... lists all information about www.mysite.com

# host -al mysite.com


... shows all information for every host in the mysite.com domain. Listing an entire domain's contents is known as performing a "total zone transfer".

dig - Short form for domain information gropher is a utility used to send queries directly to the name server, bypassing any system resolver libraries. This direct access is useful for problem isolation. The output of dig is in zone file format.
Some examples using dig are as follows:

$ dig @ns mysite.com
$ dig mail.mysite.com
$ dig -x 192.168.0.254
$ dig www.yahoo.com


Note: Dig expects to be given FQDNs for lookups, while host utility will look at the search information in /etc/resolv.conf file.

Additional help on configuring BIND
If you have installed BIND software on your machine, you can find additional docs on BIND at these locations :
BIND features - /usr/share/doc/bind-version/README
Migration to BIND from other DNS servers - /usr/share/doc/bind-version/misc/migration
BIND ver 9 administration manual - /usr/share/doc/bind-version/arm/Bv9ARM.html
Also visit the BIND home page.

Implementing DNS on Linux - Part II

September 06, 2005 2 comments
In my previous post, Implementing DNS on Linux - Part I, I explained the syntax of /etc/named.conf file. In this post, I will explain the rest of the steps needed to implement DNS in Linux using BIND.

Zone Files
Zone files reside in the /var/named/ directory. These files are those named in the /etc/named.conf file with the 'file' directive.

For example, in Part -I of this post, I had created a zone called mysite.com which had a file directive by name "mysite.com.zone". So I move to /var/named/ directory and create a file by the same name here.

# touch mysite.com.zone

Similarly for each zone you have created in /etc/named.conf file, you should have a corresponding file by the same name as that given in the file directive in the /var/named/ directory.

Syntax of Zone File
  • Begins with $TTL (Time To Live). This determines the default length of time in seconds which you want resolving servers to cache your zone's data.
  • First resource record is zone's Start Of Authority (SOA).
  • Zone data in additional resource records.
  • Fully qualified domain names (FQDN) in zone file must end with a dot (.) .
    BIND assume that the names that don't end with a dot should end with the name of the current domain. Always use a dot at the end of a name that is fully qualified.
  • Semi colons ; in database files signify a comment to the end of line.
Example :

; FILE : mysite.com.zone
$TTL 86400 ; Time to Live in Seconds

@ IN SOA ns.mysite.com. root.mysite.com. (
20011042501 ; Serial Number.
300 ; refresh.
60 ; retry
1209600 ; expire
43200 ; minimum TTL for negative answers.
)
...


The @ is interpreted as the name of the originating domain - mysite.com in the above example. The @ itself is not mandatory, but the domain must be indicated. The values of fields between the brackets, except for the first, are time periods.

Serial numbers - Are based on ISO dates. Every time the data in the database is changed, the serial number must be increased in order that the slave servers know the zone has changed.

Refresh - Is the delay time that slave name servers should wait between checking the master name server's serial number for changes. A good value is one hour.

Retry - is the delay time that a slave name server should wait to refresh its database after a refresh has failed. One minute is a good value.

Expire - is the upper time limit that a slave name server should use in serving DNS information for lack of a refresh from the master name server. A good value is 7 days.

The minimum time to live for negative answers specifies how long a nameserver should cache a "no such host" response from an authoritative server of the domain. This reduces load on the server.

Note that all times are in seconds by default. However, the following may be used :
W = Weeks
D = Days
H = Hours
M = Minutes

Must use capital letters, no space between the number and the unit is allowed.

The last string in the first line of the SOA record (root.mysite.com. in the above example) specifies the contact person for the domain. Conventionally, the responsible party's email address is used, replacing the @ with a dot.
Types of Records in a Zone File
Name Server NS
There should be an NS record for each master or slave name server serving your zone. NS records point to any slave servers that should be consulted by the client's name server if the master should fail.

; FILE : mysite.com.zone
...
@ IN NS ns.mysite.com.
mysite.com. IN NS ns1.mysite.com.
...

NS records designate name servers to use for this domain. It should contain at least one DNS server that is authoritative for the zone. A list of slave servers that can be referenced is commonly included. Fully qualified names must be used for NS resource records. The @ notation allows the domain name to be taken as the originating domain for the zone.

A record - An A resource record maps a hostname - which may or may not be fully qualified - and an IP address.

; FILE : mysite.com.zone
...
mail IN A 192.100.100.5
login.mysite.com. IN A 192.100.100.6
...

PTR - These are the inverse of A records - they map an IP address to a hostname. For reverse lookups - that is, PTR records - specify the octets of the domain in the reverse order. For example, if the zone was defined as 100.192.in-addr.arpa, then the name server would expand the PTR reference in the slide into 6.100.100.192.in-addr.arpa. A lookup of 192.100.100.6 would find this reference and would return login.mysite.com.

; FILE : mysite.com.zone
...
login.mysite.com. IN A 192.100.100.6
6.100 IN PTR login.mysite.com.
...

MX - These records are used to define mail handlers (or, exchangers) for a zone. MX records must have a positive integer listed immediately after the MX and before the host name. This integer is used by remote Mail Transport Agents (MTA) to determine which host has delivery priority for the zone.

; FILE : mysite.com.zone
...
mysite.com. IN MX 5 mail.mysite.com.
mysite.com. IN MX 10 mymail.mysite.com.
...

Precedence is given to the mail exchanger with the lowest priority. If that host is not up, then the next lowest priority mail exchanger will be used. If none of the mail exchangers are up, then the mail will be returned to the forwarding SMTP server to be queued for later delivery.

CNAME - These records map address aliases.

; FILE : mysite.com.zone
...
pop IN CNAME mail
ssh IN CNAME login.mysite.com.
...

Note: CNAME, A and PTR resource records comprise the bulk of resources seen in the database files. Incorrect setup of these records can cause many problems, so they should always be evaluated carefully before changes are committed.

Round-Robin load sharing through DNS
Load balancing can be achieved through the simple use of multiple A records.

; FILE : mysite.com.zone
...
www 0 IN A 192.168.1.10
www 0 IN A 192.168.1.11
www 0 IN A 192.168.1.12
...

Note: DNS traffic will increase because a TTL of 0 means queries will never be cached.

To be Contd...

Implementing DNS on Linux - Part I

September 05, 2005 0 comments
In the previous post - Understanding Domain Name System , I had explained about domain, zone and its features. Here I will explain how to implement DNS on linux.

Berkeley Internet Name Domain (BIND) is the most widely used DNS server on the internet. BIND provides a stable and reliable infrastructure on which to base a domain's name and IP address associations.
The current BIND is version 9. It has many features like providing IPv6 support, allowing 8-bit clean names and better multi-threading. BIND is maintained by Internet Software Consortium isc.org .

First step in successful implementation of BIND is to make sure that you have bind and bind-utils package installed on your system. If you are using RedHat, you can find it by executing the command(s):

# rpm -q bind
# rpm -q bind-utils

DNS Service Profile
Daemons : named , rndc
Ports : 53 (domain) and 953 (rndc)
Configuration files : /etc/named.conf , /var/named/* , /etc/rndc.*
GUI (Only in RedHat/Fedora) : system-config-bind

If you want to implement a caching name server then you should also install caching-nameserver package and for cryptographic support install openssl package.

Configuring BIND
The default configuration file is /etc/named.conf which is read by named (BIND daemon) during startup or service reload.

/etc/named.conf
  • Comments can be of C,C++ or Shell style.
  • The contents of the file is divided into blocks delineated by braces '{}' . Each block can contain sub-blocks within. Each block ends with a semi-colon.
  • Directives options, server and zone precede the blocks.
Options Directive
Commonly used global options

  • directory : Base directory of all relative paths specified in named.conf
  • forwarders : Server forwards queries it can't answer to the name servers at the IP address in the list. If it gets no answer, it will try a root name server unless the forward-only option is also set.
  • allow-query : Specifies an address match list of hosts allowed to query this server. If this option is not set, any host can query the server.
  • allow-transfer : Like allow-query, specifies hosts that may copy the database. Should be used to limit zone transfers. By default zone transfers are not permitted unless explicitly stated using the allow-transfer statement.
Eg:

#FILE : /etc/named.conf
...
acl "mynetwork" { 192.168.100/24; }; # Gives a name for the network
options {
directory "/var/named";
forwarders { 203.22.11.121; };
allow-query { mynetwork; };
allow-transfer { mynetwork; };
};
...

Address Match Lists - acl

Address match list is a list of semi-colon seperated IP addresses, networks, or named address match lists.
You can use acl to create a custom named address match list as shown in the above snippet.
Trailing non-significant zeros may be dropped. For example you can denote the network 192.168.5.0 as 192.168.5 .
acl makes the configuration easier to read and maintain.

For acls there are 4 pre defined named address match lists available. They are as follows :
  1. none : No IP address matches
  2. any : All IP address match.
  3. localhost : Any IP address of the name server matches.
  4. localnets : Any network on which the name server has an IP address matches.
For example, to create an acl which matches only the server, we write it as follows:

acl "mylocalmachine" { localhost; };

One of the main benefits of ACLs is that they make the configuration file easier to maintain and more human readable. They provide a central place where the IP addressed may be changed which is considerably easier than replacing those IP(s) throughout the file if a change needs to be implemented.

Zone directive
Master and slave zones are declared with the zone directive in the /etc/named.conf file. Every non-cached domain name must have a master zone so that authoritative records can be generated for queries.
For Example:

zone "mysite.com" {
type master;
file "mysite.com.zone"; # File name should indicate the zone.
};

zone "kernel.org" {
type slave;
masters { 192.168.192.5; };
file "kernel.org.zone";
};

Note: Slave zones look similar to their masters counterparts. The 'master' sub-directive must occur if the 'type' sub-directive equals 'slave'. A 'file' directive is used to store a local copy of the database which lessens the load on the master server. However, it is not required.

Reverse Lookup Zones
You also have to set reverse lookup zones. This is done as follows:
  1. Determine the network the zone should cover. For example, let us consider the network 172.100.10/24 .
  2. Reverse the order of octets in the network address. From above, we take 172.100.10 and reverse it to 10.100.172 .
  3. Append in-addr.arpa to the reversed string. Appending on to the result of step 2 we get 10.100.172.in-addr.arpa .
So the syntax for reverse lookup zones will be -

zone "10.100.172.in-addr.arpa" {
type slave;
masters { 172.100.10.1 };
file "172.100.10.zone";
};

Special Zones
Root Zone - Every BIND configuration must include a root zone. The root zone is used when a query is unresolvable by any other configured zones . The type of root zone is 'hint'.

zone "." {
type hint;
file "named.ca";
};

The file 'named.ca' contains information about root servers on the internet. This information rarely changes, but the latest version can always be obtained from rs.internic.net .
Loopback Zone - Though not strictly required, they should also be specified. Many programs like the X window system use local UNIX sockets to emulate IPC queues between cooperating processes. These sockets are bound to 127.0.0.1, the loopback address. Loopback zones should never be slaves.

zone "0.0.127.in-addr.arpa" {
# Specified like other reverse lookup zones.
};

This brings us to the end of editing the /etc/named.conf file.

In the next part, I will explain the syntax of the zone files which reside in /var/named/ directory.
To be Contd ...

Understanding Domain Name System (DNS)

September 04, 2005 6 comments
Domain Name System (DNS) makes it possible to refer to Internet Protocol (IP) based systems (hosts) by human-friendly names (domain names). Name Resolution is the act of determining the IP address (or addresses) of a given host name.

Benefits of DNS
  • Domain names can be logical and easily remembered.
  • Should the IP address for a host change, the domain name can still resolve transparently to the user or application.
The structure of Domain Names
  • Domain names are separated by dots, with the topmost element on the right. Eg: www.yahoo.com . IP addresses have topmost element on the left.
  • Each element may be up to 63 characters long. The entire name may be atmost 255 characters long.
  • The right most element in a domain name is called the Top-Level Domain (TLD). Referring the above example (www.yahoo.com), TLD is 'com'.
  • If a domain name is not shortened, it is called the Fully Qualified Domain Name (FQDN). For example, briefcase.yahoo.com can be specified by a machine in the yahoo.com domain as either briefcase.yahoo.com (FQDN) or as briefcase.
Host names map to IP addresses in a many-to-many relationship. A host name may have one or more IP addresses. Conversely, an IP address may have multiple host names associated with it.

Hosts that are designed to perform email routing are known as mail exchangers. These machines should have special purpose records in DNS called Mail eXchanger (MX) records. When a SMTP server or mail server, needs to send mail to a remote domain, it does a DNS lookup for the Mail Exchanger (MX) of that remote domain. A domain can and should have multiple mail exchangers. Mail that cannot be sent to one mail exchanger, can instead be delivered to an alternative server, thus providing failsafe redundancy.

Different types of Domain Name Servers
  1. Root Name server - Each top level domain (such as in,edu,com etc) has one or more root name servers which are responsible for determining where the individual records are held. These servers are fairly static and every machine on the internet has the capability of reaching any of them. A root name server is allocated like just one to three per country. For example, India has only 2 root name servers.
  2. Authoritative Name Servers - These are the servers that the Root name servers send queries to. These servers hold the actual information on an individual domain. This information is stored in a file called a zone file. Zone files are updated versions of the original HOSTS.TXT file.
  3. Resolving Name Server - These are the servers that do most of the work when you are trying to get to a machine with a certain host name. Besides being responsible for looking up data, they also temporarily store the data for host names that they have searched out in a cache, which allows them to speed up the resolution for host names that are frequently visited.
Zone
A zone keeps the information about the domain database. It does this by maintaining two types of files:
Zone File - It is used to map host names to address, to identify the mail servers, and to provide other domain information.
Reverse Zone File - This file is responsible for mapping IP address to host names, which is exactly the opposite of what the zone file does.

Note: The zone file and the reverse zone file has to be maintained by the user.

Name Server Hierarchy
Master Name Server - Also called primary server. This contains the master copy of data for a zone.
Slave Name Server - Also known as secondary server. This provides a backup to the master name server. All slave servers maintain synchronization with their master name server.
A zone may have multiple slave servers. But there will be only one master name server per zone.

Fig:
Step - by - step details of domain name resolution.


Scribus - The free DTP software for Linux

September 02, 2005 1 comments
Scribus is a robust desktop publishing (DTP) GPLed software for Linux and other Unixes.

What is Desktop Publishing (DTP)

Desktop Publishing (DTP) also known as prepress publishing combines a personal computer and WYSIWYG page layout software to create publication documents on a computer for either large scale publishing or small scale local multifunction peripheral output and distribution.

The term "desktop publishing" is commonly used to describe page layout skills. However, the skills and software are not limited to paper and book publishing. The same skills and software are often used to create graphics for point of sale displays, promotional items, trade show exhibits, retail package designs and outdoor signs.

A DTP software is a page layout software which gives users great flexibility in placing objects like images, text, and logos in the exact place where you want them. A DTP is commonly used in advertising and publishing firms to create print ready documents, flyer's, CD covers, advertisements, greeting cards, company brochures, newsletters and posters.

All newspapers around the world use DTP software to layout the news matter before it is send to print. Using a DTP software you can create files which print easily at your commercial printer (printing press). The industry leaders in DTP software are Adobe (Pagemaker) and Corel (Draw) which are commercial ventures and which support only windows platform.

But now Linux has got its own DTP software in Scribus which rivals these market leaders in the features it exhibits.

Fig 1: Cover page of a magazine designed in Scribus.


Fig 2 :The content of the magazine which displays the images and the text in a beautiful manner.
Fig 3: Easily create interactive PDF forms using scribus.

Scribus supports professional publishing features such as CMYK colour (Cyan,Magenta, Yellow, blacK) separations ,ICC colour management and embedding ICC profiles in PDF documents for accurate screen to print color, which are a must in any DTP software. Other features include importing and exporting to PDF, EPS (Encapsulated PostScript), SVG (Scalable Vector Graphics) and more common formats like text, images and so on. There is a great set of tutorials for those interested in using Scribus at docs.scribus.net.

Vim - The powerful simple editor

September 01, 2005 1 comments
You select any Linux/Unix OS distribution; from the spartan linux which fits on a floppy to the industry heavy weights like redhat and suse; you are guaranteed to find the vi editor. So it is really worth ones time to learn how to use this powerful but simple editor. Vim is the modern version of the vi editor. Learning to use vim (vi) contains an initial learning curve. But the power it gives the user to accomplish complex text manipulation with just a few keystrokes makes the trouble taken to learn worth it.

Here I will explain a few commonly used commands in Vim. Vim (vi) is an editor with modes of operation. There are three modes of operation in vim. They are as follows :

Who owns which port ?

0 comments
Linux contains a lot of command line tools which make the job of a network administrator easier. One of them is netstat. Netstat is a multi-purpose network informantion tool. Using netstat, you can find which port is used by which process or user by using the following command:

# netstat -an | more
There is a utility called fuser which also tells you which user and process owns a port. For example, if you want to find who owns port 631, you execute the following command:

$ fuser -v -n tcp 631
Note : Ports below 1024 are reserved for common services , and only root can use them. Standard port numbers can be found in /etc/services file. The rest of the over 65K ports can be used by normal users or processes.